We are working on providing licensed windows 2008/2012 templates, but, I am sure that wont cover all bases as you will wish for larger/smaller disks or 2003, whatever.
So, how would you install windows in iwstack ?
You might think is simple: link your ISO while selecting the appropriate windows template then create the VM with the desired characteristics and you can proceed to installing it.
Well, it will work, but the performance will be at least 30% worse for large ram ones and even more for small ram ones.
In order for this to work well, you need to use the virtio drivers for windows. How to do that ? It is very simple, read on.
Lets prepare the ISO first. Say, I wish to install 2008 R2 Server. For that I will first need to download it and put it on some webserver since linking directly to Microsoft might not work, download from here (for example): http://www.microsoft.com/en-us/download ... x?id=11093
Note: there are many places where you can download windows ISOs legally, try to avoid filesharing sites, not only that they are slow, but many contain trojans or other backdoors, try to get it from Microsoft or distributors. Even if you cannot find your language, you can later download the language pack and install it over the standard EN-US version. You can, of course, use your own, it is fairly simple to transform your CD/DVD into an ISO using standard free disk image software such as http://cdburnerxp.se/en/home
You can then go to Templates, select ISO and then in the upper right you will see register ISO. After that is straight-forward except that you will need to make sure you select a PV template: Other PV 64 specifically, it should work on 32 Bit OSes, if you still use those, but it is better to use 32 in that rare case.
I will proceed demonstrating with 2008 R2 as I have already that loaded, but you can be sure it will work on any version still supported by Microsoft.
So, lets create the VM (make sure you allowed enough time for the ISO to download, if the download is not complete, it will not appear in the list under "My ISOs").
Go to Instances, Add instance:
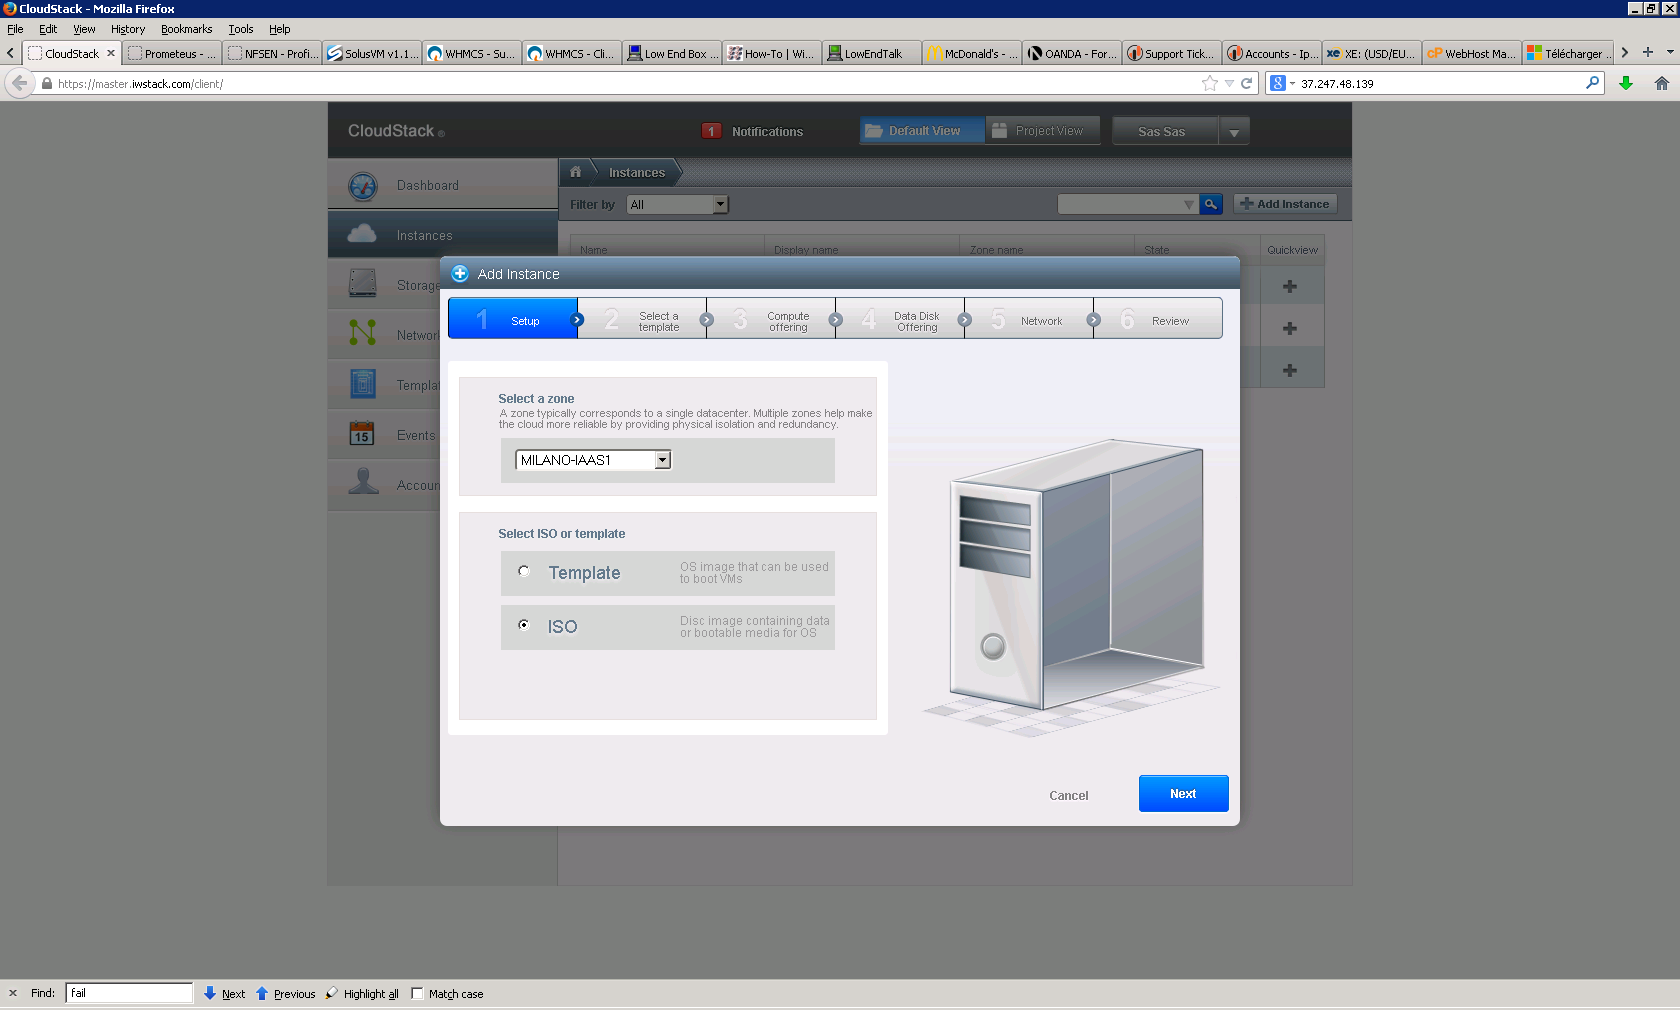
Select the ISO you added in the next screen (you will find it under my isos)
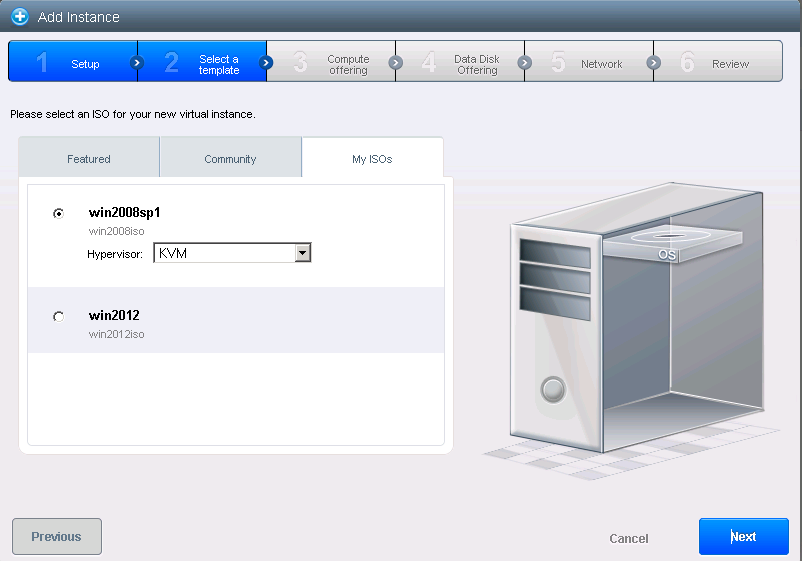
You can now proceed selecting your compute offering (2 GB is recommended if you wish to run some programs too), disk size (select custom and put at least 16 GB otherwise it may complain it is too small and wont install-some versions require at least 16 GB), select network (it is advisable to put it in an isolated network, but server versions have pretty good firewall and security so putting it directly on the shared network is OK as long as you put it to automatically install security updates) and give it a name.
Now we have to wait a bit to be created. After it is ready go to the + sign near it and select view Console:
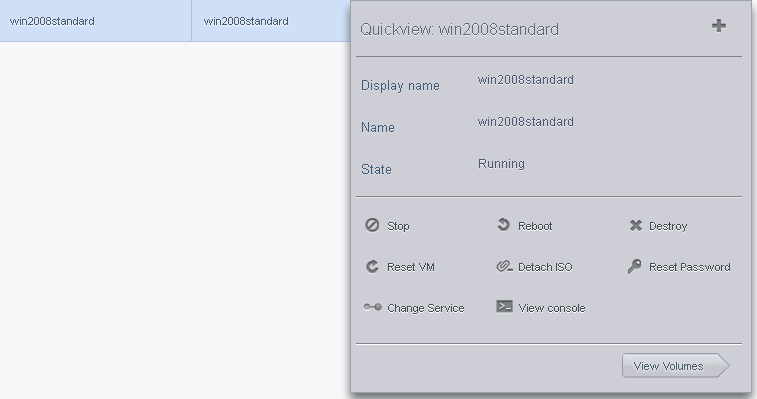
Note the detach iso button, we will need it later.
Now we need a bit of patience with the console, it is javascript based and at times very slow (depends on your location and java version installed). Let it load, select new install (advanced) and it will complain it cant find any disks (normal since windows does not come with virtio drivers preinstalled and will not know how to look for the virtual drive):
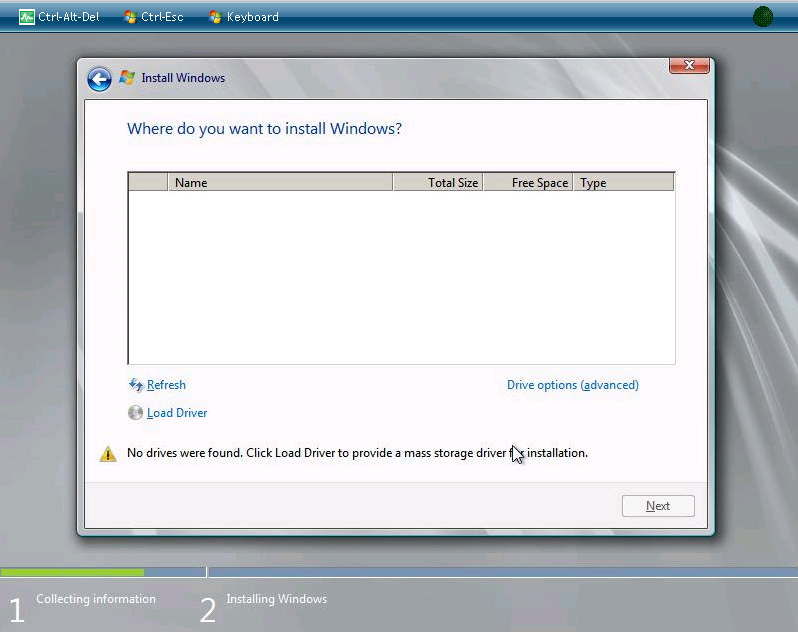
Now we are doing a trick: we detach the windows ISO and attach an ISO with the virtio drivers:
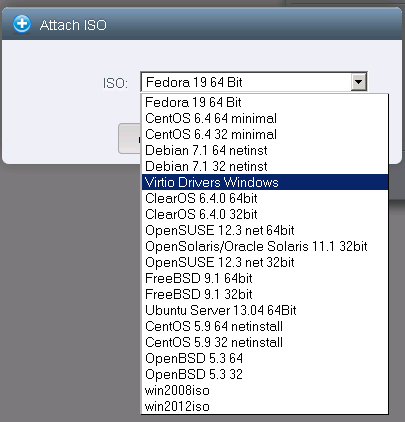
First step is detach ISO, then go same place and choose attach iso. You will be presented with a choice, select Virtio Drivers Windows:
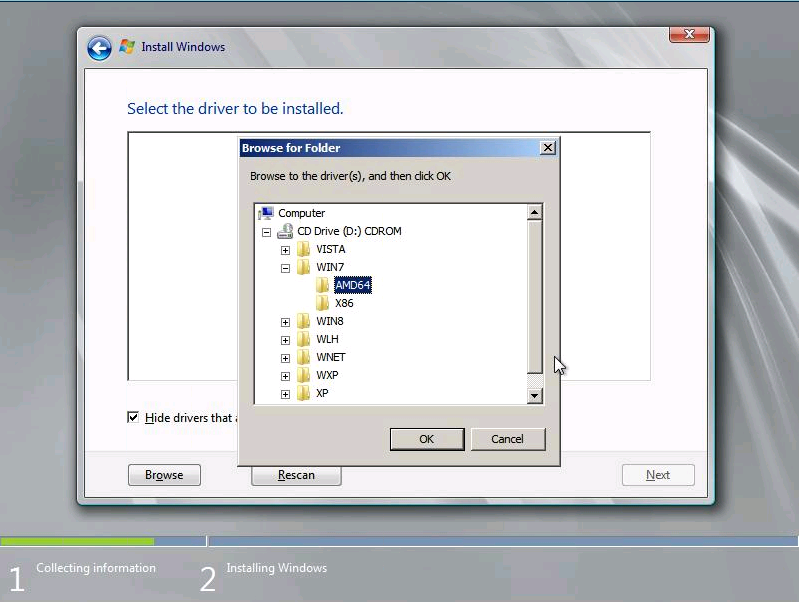
After the ISO is attached, go back to the console and click load driver button. Next click browse and click the + near the cd drive and you will be presented with a wide variety of Microsoft supported OSes. You must pay attention to select correctly, it will not always be obvious, for example for 2008 R2, you need to select windows 7 64 bit (AMD64), for windows server 2012 win8, etc. Since i go with windows server 2008, i will select windows 7:
You will have to load both network and disk drives, if you load only the disk drives you will not have network after installation. You can leave out the baloon driver, that is used only bu hosts which overcommit RAM, it is not our case:
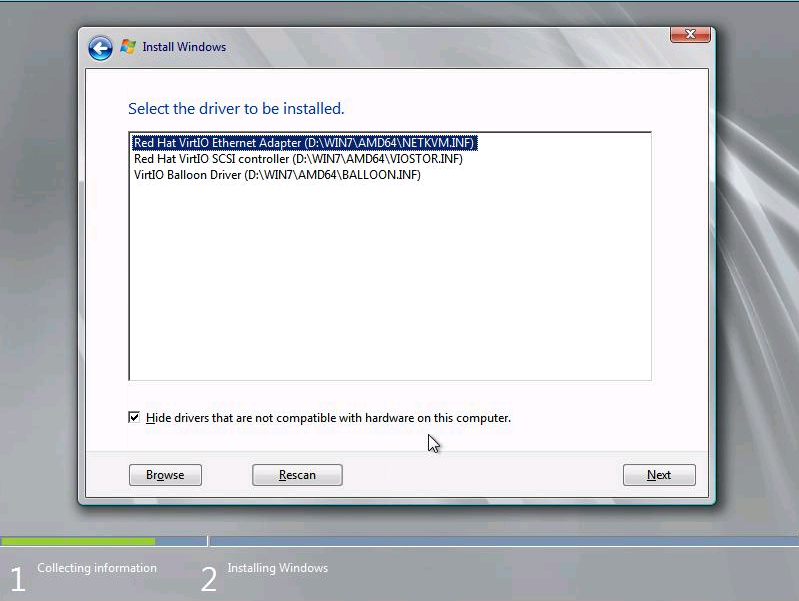
So, do not forget you need to load both drivers, network and VirtIO SCSI driver so you need to repeat the operation 2 times for the 2 drivers (load driver, browse, select it from list).
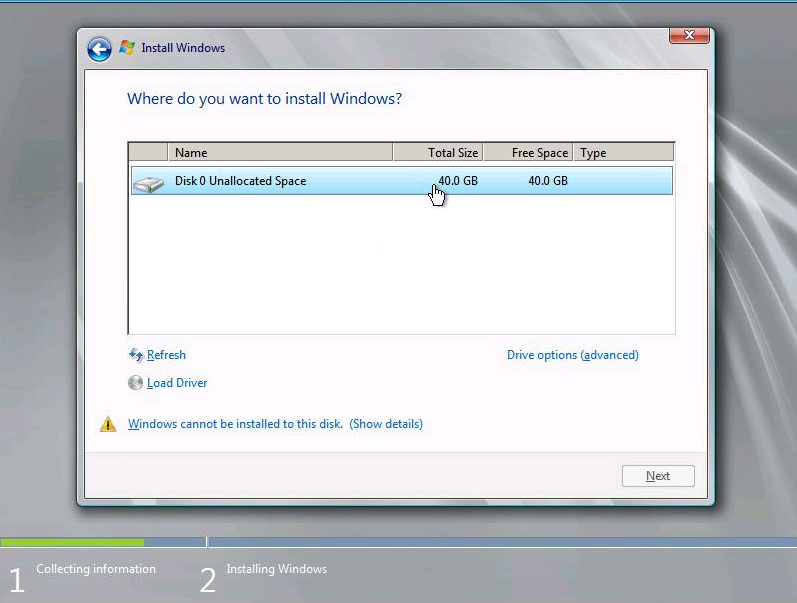
After you are done, go back to the UI and select detach ISO (we remove the one with the virtio drivers) and attach ISO (we put back the windows one to continue install). The installation program will not be able to see the ISO immediately without an action of ours and will display a bizarre error (Windows cannot be installed to this disk), so we have to select the newly discovered virtual drive (by clicking on it) to be able to continue:
This is all !
You can now proceed to install as you would normally do on a real computer.
Enjoy your fast windows machine !
