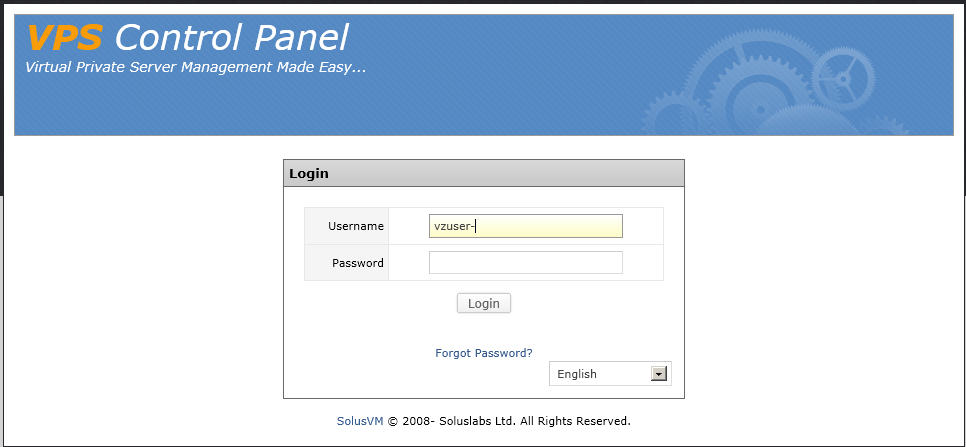
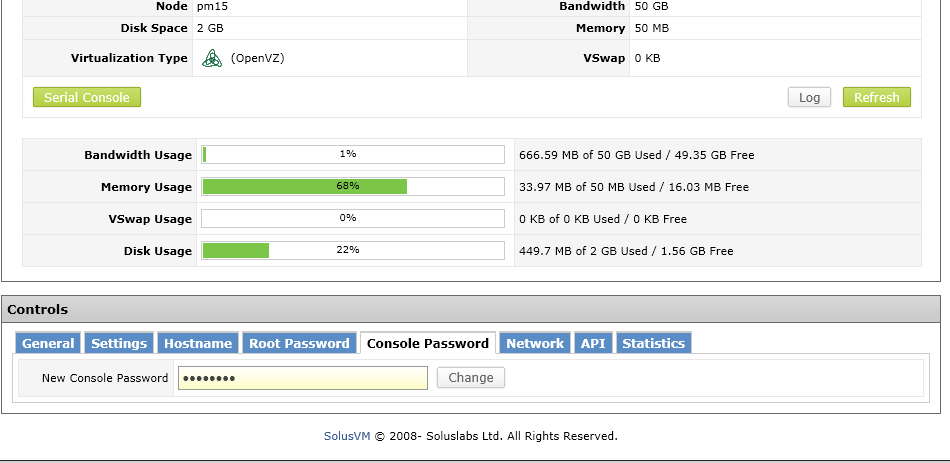
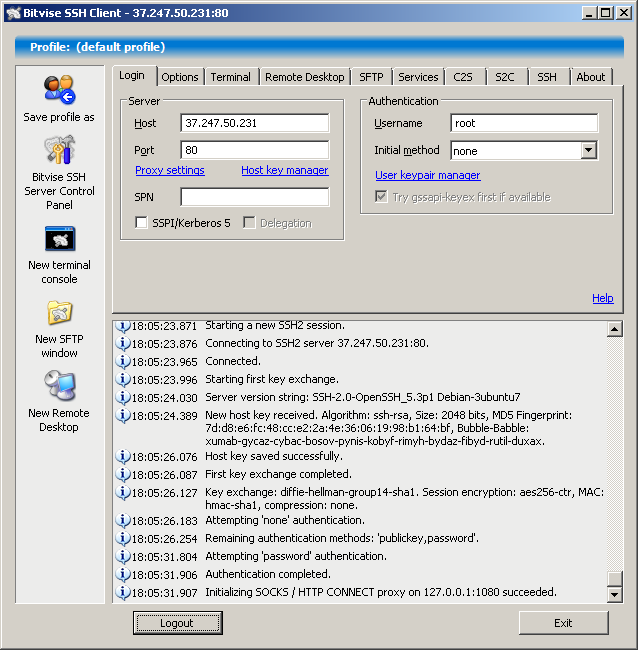
Extremely simple VPN (SSH tunnel)
Posted: Sun Aug 12, 2012 5:10 pm
We already have PPTP and OpenVPN tutorials here, but I heard that in some restricted environments they might not work (especially PPTP), for example if you are behing a badly of restrictively configured router.
I want to give you here the ultimate solution that will work in all cases, speciffically the SSH tunnel over port 80.
*WARNING* Be aware that you will no longer be able to run a webserver on your VPS, so you should pick a plan only for VPN, the 50cents one will work. However, at some point, we will test if it works on port 22 (default SSH) and if it does, then you dont have to move it to port 80 and block any HTTP server.
SSH works by default on any linux VPS plan, therefore you may not need to do anything on the server and this is good news for linux newbies. Keeping your distribution up to date is strongly advised, though (see the section about security).
Now we will use an application called tunellier, it will establish a VPN for us and is a simple graphical tool (tho it has many options and we will turn most of them off).
We will need the data in the provisioning mail, will look something like this: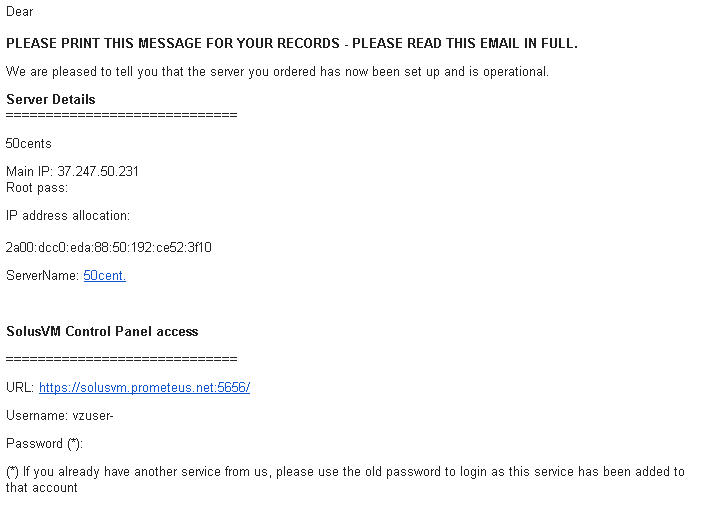
Locate your IP and root password, this is all we need for now.
Download the tunellier aaplication (made by bitwise, it is free): http://www.bitvise.com/download-area
Make sure to get the client, first one, not the server.
Install (you only have to check the I Accept... box and click install) and it will automaticaly start: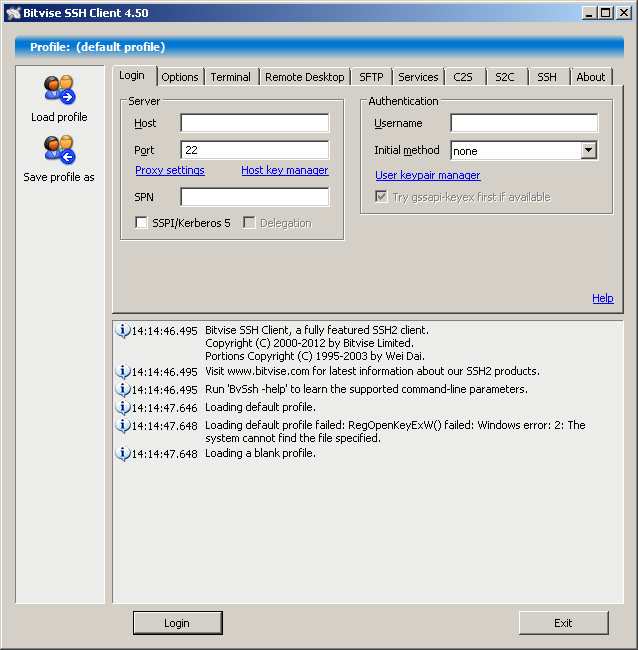
Now we dont need all features, so we will disable some:
Go to options and uncheck at the right On login panel everything.
Then we need to enable proxy:
Go to services and in the right panel click check the enable box at socks/http proxy (you can leave the other settings default):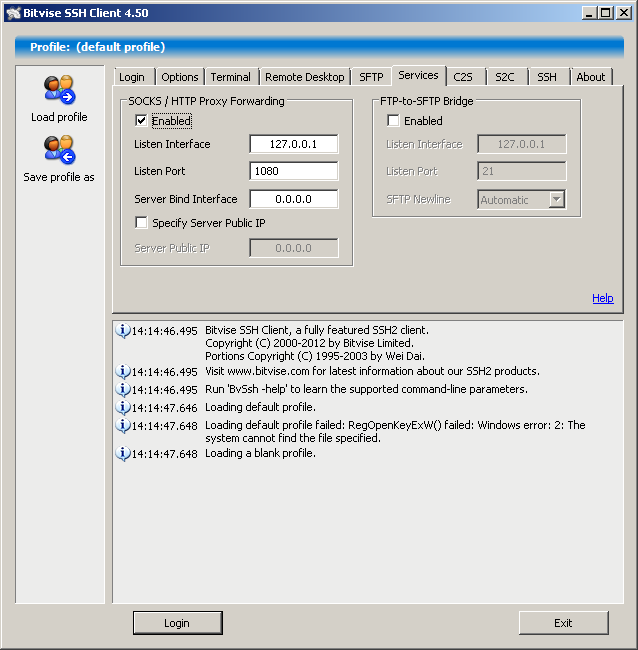
And compression to speed up things on a slow connection in the SSH tab: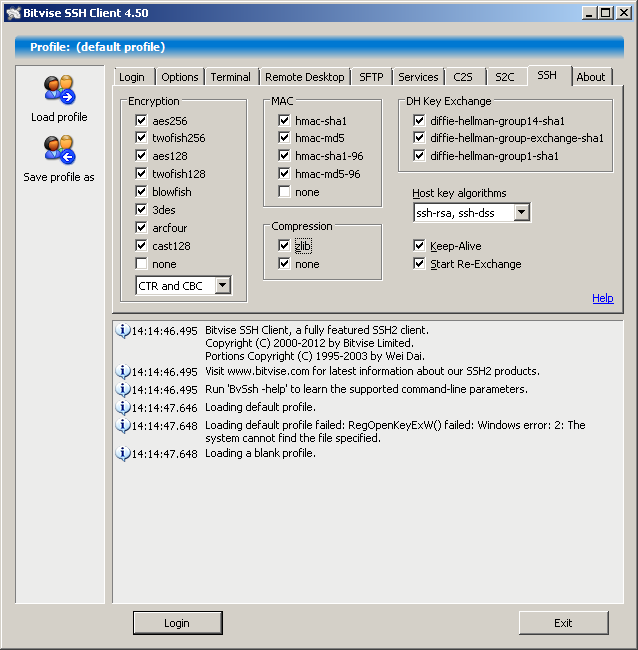
Should be ok with settings, now return to the first panel:
and introduce your IP and username (root):
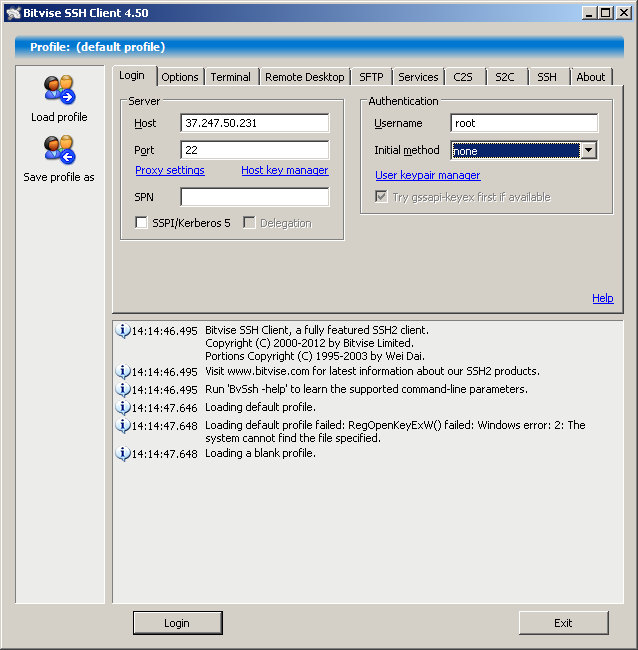 and save profile by clicking the save profile as button at the left.
We are now ready to connect. Click login !
You will have to accept and save the key:
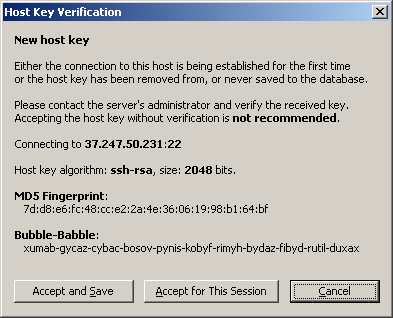
but this is only at the first connect, next time wont ask again unless you reinstall the VPS or connect to another.
Now will ask for your password (the root password), introduce it and login, we now have a VPN connected.
In order to use it, we need to configure our software (browsers and other programs that support socks proxy) to use it.
I would use a separate browser for the proxy, for example, download and install mozilla firefox from http://www.mozilla.com.
I will show you how to configure this particular browser to use the VPN, it is similar in other browsers, but not exactly the same.
Go to tools>options>advanced>network>settings (if you dont see the menu, right-click to the right of the tab and click menu bar)
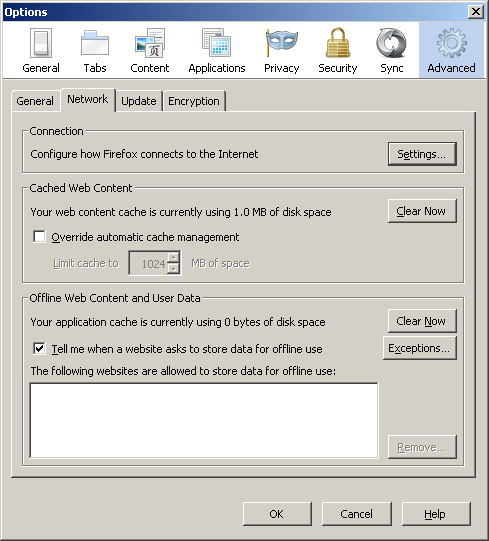
and make it look like this:
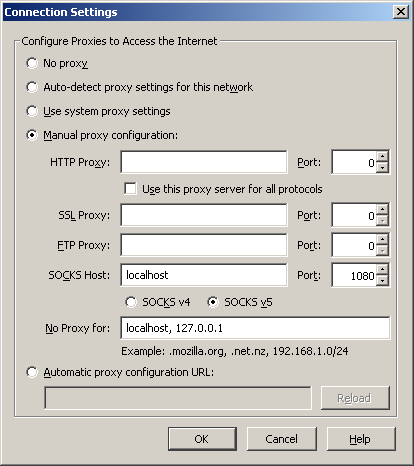
OK, save everything and should be set.
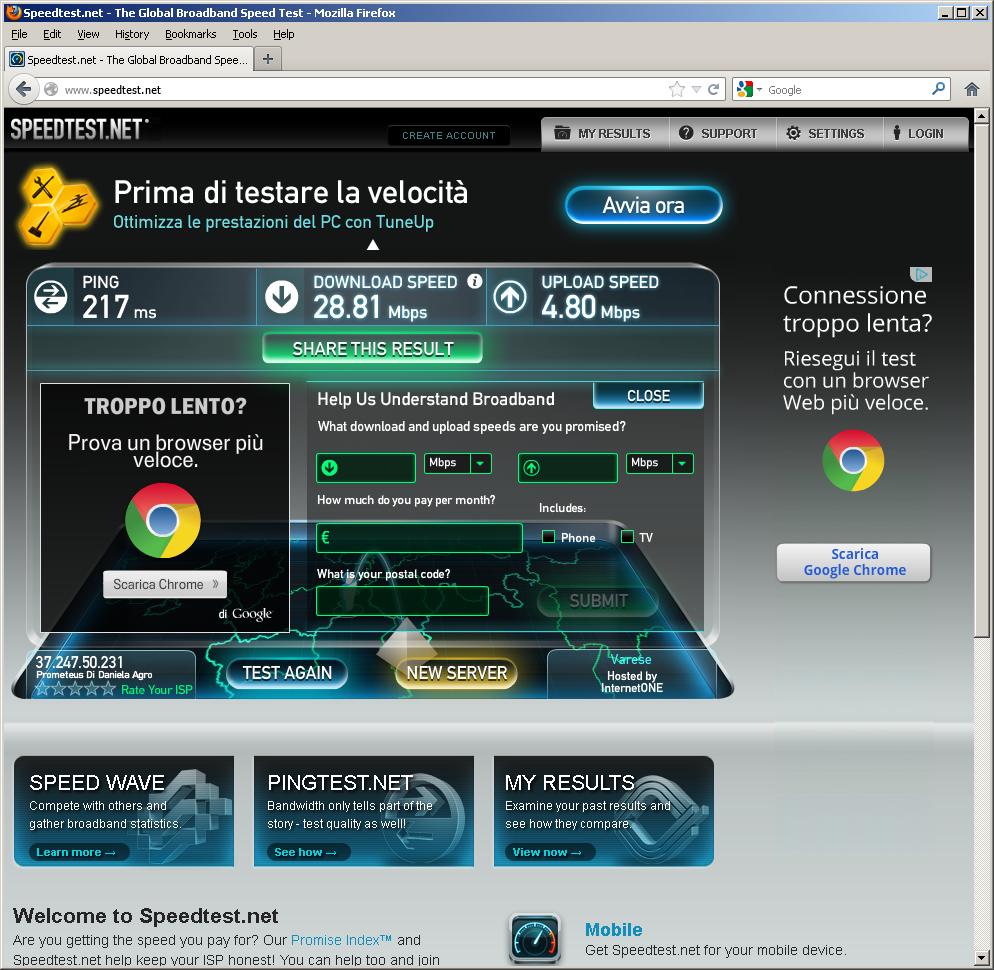
Go to http://www.whatismyip.com (or another site for that matter with similar function) and if in the next picture you see the IP of your VPS like this:

then you are successful ! You can browse the internet using your Italian IP at the cost of 50 cents a month... You can use other applications too, make them connect through socks proxy on localhost port 1080. It is also HTTP proxy, if your application does not support SOCKS. Be aware you have only 50 GB of traffic with the 50 cents plan which should be more than enough for browsing and even watching movies online, but not enough for P2P (illegal sharing will not be allowed, though).
Since the data is compressed, you will be able to increase your connection's speed if you have a slow one (to Europe at least):
 .
.
On the other hand, ping will increase because it travels longer and, as such, this is not suitable for playing fast games.
If it worked so far, great ! You can use your vps for hosting some content too (for example to link to this tutorial so others will benefit), but if it doesnt work and tunnelier cannot connect because port 22 is blocked, read the second part. We will move the connection on port 80. The next part involves some linux intervention, some command line action, but i will explain it at a very basic level and give commands in full so you only need to copy/paste them.
Read on the reply to this below.
Admin
I want to give you here the ultimate solution that will work in all cases, speciffically the SSH tunnel over port 80.
*WARNING* Be aware that you will no longer be able to run a webserver on your VPS, so you should pick a plan only for VPN, the 50cents one will work. However, at some point, we will test if it works on port 22 (default SSH) and if it does, then you dont have to move it to port 80 and block any HTTP server.
SSH works by default on any linux VPS plan, therefore you may not need to do anything on the server and this is good news for linux newbies. Keeping your distribution up to date is strongly advised, though (see the section about security).
Now we will use an application called tunellier, it will establish a VPN for us and is a simple graphical tool (tho it has many options and we will turn most of them off).
We will need the data in the provisioning mail, will look something like this:

Locate your IP and root password, this is all we need for now.
Download the tunellier aaplication (made by bitwise, it is free): http://www.bitvise.com/download-area
Make sure to get the client, first one, not the server.
Install (you only have to check the I Accept... box and click install) and it will automaticaly start:

Now we dont need all features, so we will disable some:
Go to options and uncheck at the right On login panel everything.
Then we need to enable proxy:
Go to services and in the right panel click check the enable box at socks/http proxy (you can leave the other settings default):

And compression to speed up things on a slow connection in the SSH tab:

Should be ok with settings, now return to the first panel:

and introduce your IP and username (root):
 and save profile by clicking the save profile as button at the left.
We are now ready to connect. Click login !
You will have to accept and save the key:

but this is only at the first connect, next time wont ask again unless you reinstall the VPS or connect to another.
Now will ask for your password (the root password), introduce it and login, we now have a VPN connected.
In order to use it, we need to configure our software (browsers and other programs that support socks proxy) to use it.
I would use a separate browser for the proxy, for example, download and install mozilla firefox from http://www.mozilla.com.
I will show you how to configure this particular browser to use the VPN, it is similar in other browsers, but not exactly the same.
Go to tools>options>advanced>network>settings (if you dont see the menu, right-click to the right of the tab and click menu bar)

and make it look like this:

OK, save everything and should be set.
Go to http://www.whatismyip.com (or another site for that matter with similar function) and if in the next picture you see the IP of your VPS like this:

then you are successful ! You can browse the internet using your Italian IP at the cost of 50 cents a month... You can use other applications too, make them connect through socks proxy on localhost port 1080. It is also HTTP proxy, if your application does not support SOCKS. Be aware you have only 50 GB of traffic with the 50 cents plan which should be more than enough for browsing and even watching movies online, but not enough for P2P (illegal sharing will not be allowed, though).
Since the data is compressed, you will be able to increase your connection's speed if you have a slow one (to Europe at least):
 .
. On the other hand, ping will increase because it travels longer and, as such, this is not suitable for playing fast games.
If it worked so far, great ! You can use your vps for hosting some content too (for example to link to this tutorial so others will benefit), but if it doesnt work and tunnelier cannot connect because port 22 is blocked, read the second part. We will move the connection on port 80. The next part involves some linux intervention, some command line action, but i will explain it at a very basic level and give commands in full so you only need to copy/paste them.
Read on the reply to this below.
Admin
