HowTo: Hosting multiple sites using the free EHCP panel.
Posted: Wed Oct 03, 2012 10:56 am
Hello all !
Many people try to switch from limiting shared hosting to the freedom of VPS hosting but lack the knowledge and funds to invest in cPanel.
Actually, there are many alternatives to cPanel, one of which is EHCP (Easy Hosting Control Panel) which runs on Debian and the like (Ubuntu most notable derivative).
I intend to provide here a very basic tutorial with pictures that will not need you to know linux (but it would help a lot if you have at least a basic idea).
Prerequisites:
1. One VPS (dedicated would work too, but we will be assuming you do not have the funds for that) running Debian 6 32 bit. (64 will work too, as well as Ubuntu, but if you want the job done following strictly this tutorial, better use that). 256 MB RAM are enough for a few wordpress sites with like 10 max concurrent visitors, for heavy sites as Drupal with many visitors, 1024 RAM is highly recommended, for something inbetween, like even heavy forums with 20-30 concurrent visitors in total, 512 will suffice, especially if they are backed by SSD storage). For further info, please refer to our "choose your vps" article in the same section of the board.
2. A file where you will write down a lot of info such as passwords, domains, anything you haven't done before and you think you might forget. If you like pen and paper, no problem, it will do.
3. While not required, a domain at least could be useful, but we will not need it just for this to work. Since the purpose of a panel is to host multiple sites or give your friends hosting access too, it doesn't really make sense not to have some domains, but as I said, it is no problem at all if you use free ones or free subdomains. My demonstration will make use of free subdomains from freedns.afraid.org but you may use your preferred ones.
It should be working the same on any other high quality host. Location does matter if you are hosting big movies, streaming content (EHCP has ffmpeg installed by default, this being one of the reasons I picked it for the demonstration) or game servers (but for that you do not really need a hosting panel, at most a special one). Otherwise, any location within an 100-150 ms or so ping will do. (ping board.prometeus.net to test prometeus suitability)
Phase one: Preparing the VPS
You should have an email about your new VPS. It should look like this:
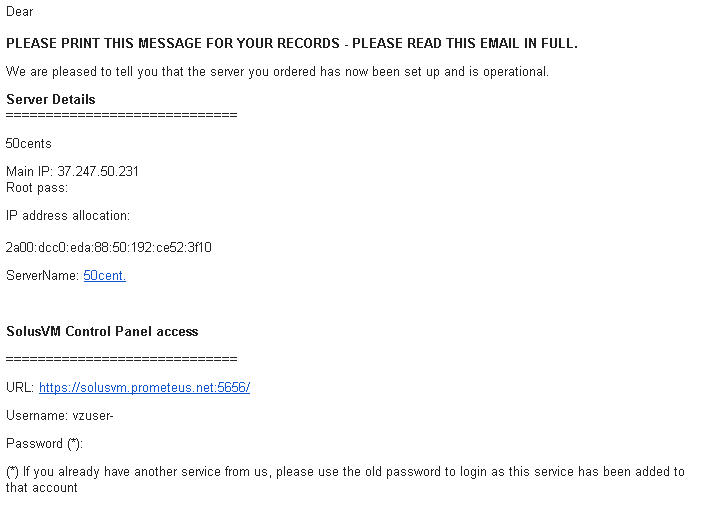
Of course, that is just an example, we will not use the 50cents plan for a panel, it simply lacks the memory required.
We need from there the solusvm information. Address, username and password. Write them down.
Now go to SolusVM panel: https://solusvm.prometeus.net:5656 (Your actual provider will, of course, have a different address.)
Login. Will look like this:
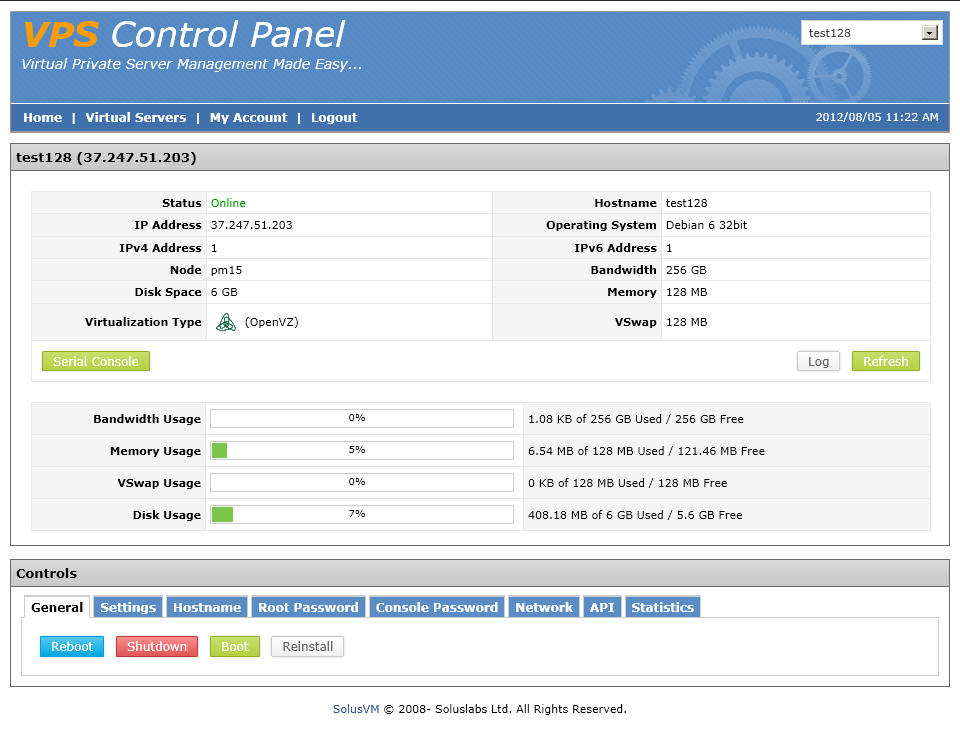
Select your VPS, click manage. If it says Debian 6 32 bit (like in the picture, we are ready to go, if not, you need to reinstall it... Don't worry, with solus and OpenVZ it is simple as clicking around and waiting a bit.
Click reinstall (only if it is not already debian 6 32 bit ! Otherwise go to the update root password step) and you will be presented with a choice like this:

Make sure to select the Debian 6 32 bit radio button and proceed with the reinstallation. It should take about 2 minutes or less.
Update root password: Go back to the solusvm panel and select root password. Input something at least 8 chars long, only letters and numbers because solusvm has a bug that will prevent some special characters from working. We will change the password later while inside, for now, mypass1234 or anything like that will work.
From now on we will stop using graphical tools for a while and only use command line. It should not be hard if you follow my instructions.
If you use a MacOS of some kind, you will use the terminal (ssh root@yourvps IP will do the trick) but we are mostly here to help windows people which do not know much linux if at all so the rest of the tutorial will make heavy use of windows specific tools.
So, the windows users should download putty from here: http://www.chiark.greenend.org.uk/~sgta ... nload.html (get the putty.exe version).
Fire it up and put there the IP of your VPS and a session name. Before loging in, save the settings.

At first login putty will ask you if you accept the key. This will happen each time you reinstall or connect to a new VPS, but not in regular conditions.
Put your username (always root), hit enter, then the password you just put in solusvm (or the one in the provisioning mail if you already had Debian 6 32 bit installed-make sure it is the ssh password, not the solusvm one) and you should receive a disclaimer from your Debian server showing that it is ready to work for you.
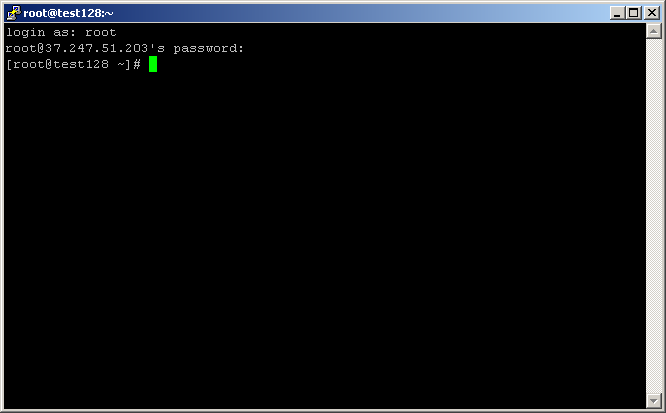
(without the disclaimer, tho, your image will be a bit different)
Change root password to something more complex than only numbers and letters, include special chars such as *&#$ in the next step. You will be asked to insert your new UNIX password and confirm it: [Enter]
After this, your root password used to login with putty will be the new one.
Now, we update the installation, a thing we will need to do from time to time to keep the risk of exploit minimal. Type (or copy-paste to be sure) exactly as below hitting enter after each line.
Answer yes (y) at all prompts if any.
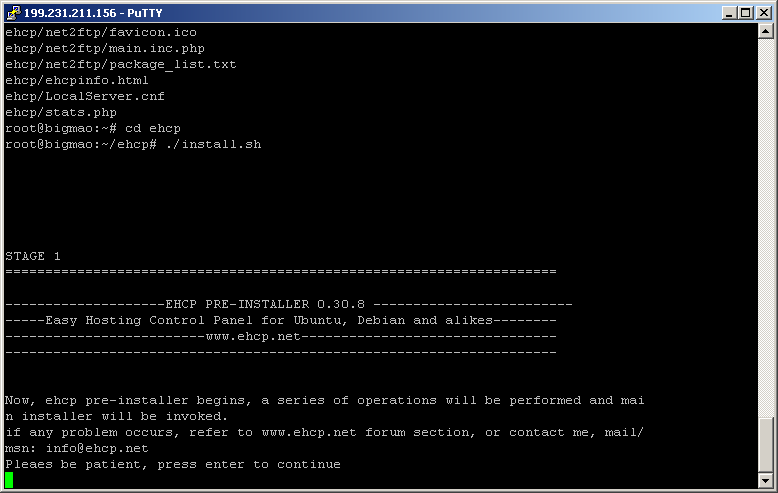
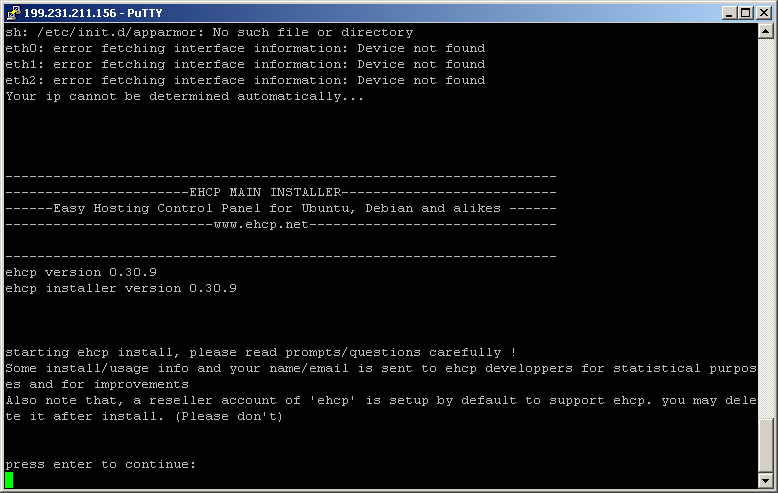
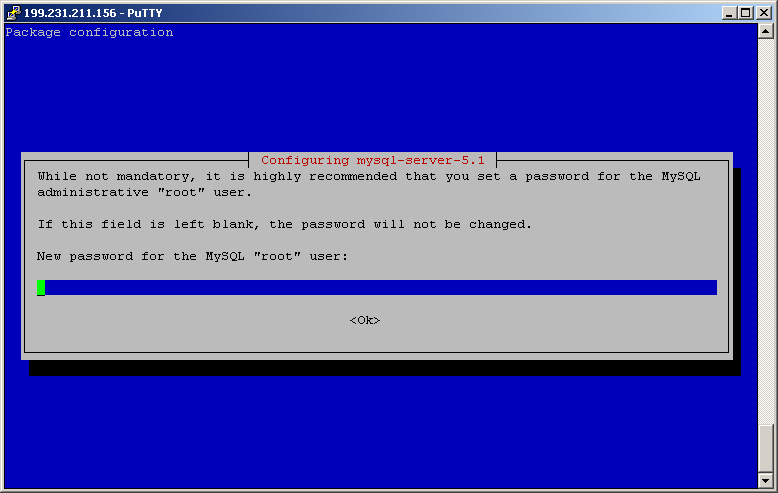
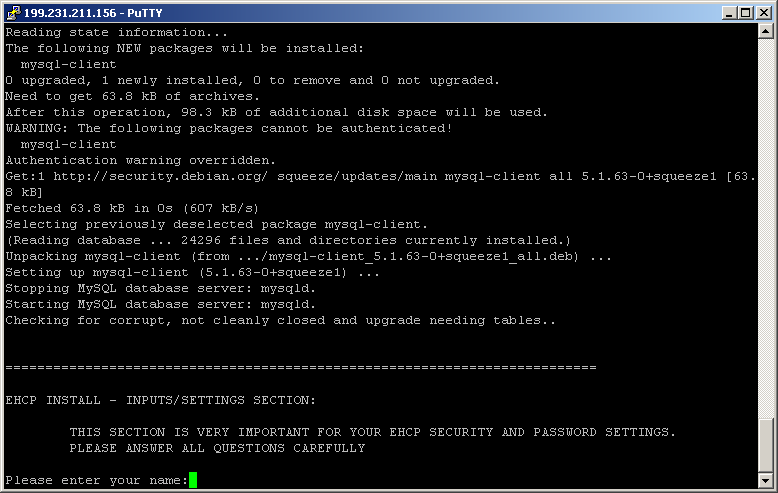
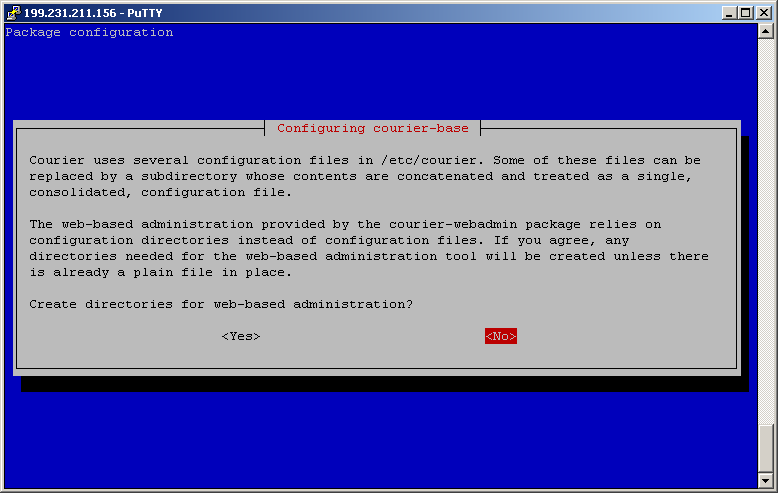
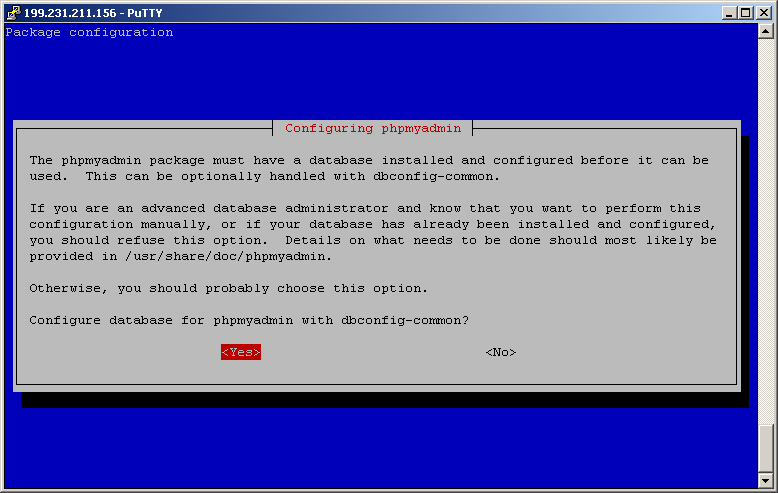
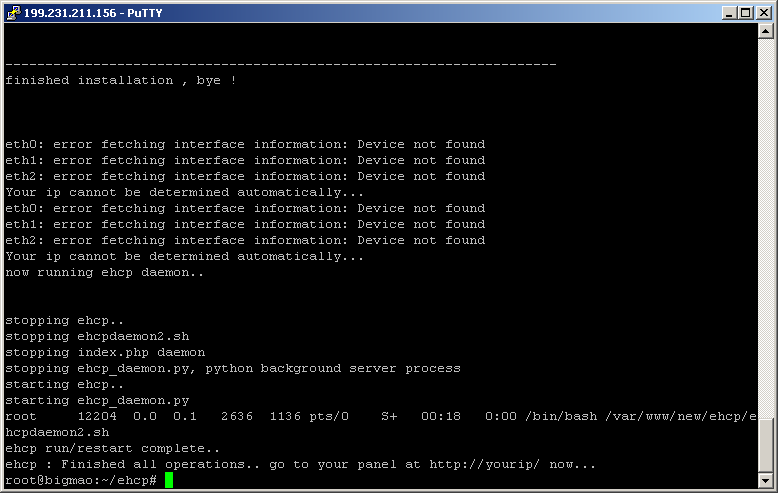
Now we are ready to install the panel. It will take a while and we will need to answer a few questions along the way as well as input many passwords and usernames we will need later. Make sure you write them down, use fairly complex ones (could be only one though, if you really have a problem with passwords, but make it at least 10 characters long, use only letters and numbers to be sure it works in all places).
It will be continued in the next post on this thread.
Admin
Many people try to switch from limiting shared hosting to the freedom of VPS hosting but lack the knowledge and funds to invest in cPanel.
Actually, there are many alternatives to cPanel, one of which is EHCP (Easy Hosting Control Panel) which runs on Debian and the like (Ubuntu most notable derivative).
I intend to provide here a very basic tutorial with pictures that will not need you to know linux (but it would help a lot if you have at least a basic idea).
Prerequisites:
1. One VPS (dedicated would work too, but we will be assuming you do not have the funds for that) running Debian 6 32 bit. (64 will work too, as well as Ubuntu, but if you want the job done following strictly this tutorial, better use that). 256 MB RAM are enough for a few wordpress sites with like 10 max concurrent visitors, for heavy sites as Drupal with many visitors, 1024 RAM is highly recommended, for something inbetween, like even heavy forums with 20-30 concurrent visitors in total, 512 will suffice, especially if they are backed by SSD storage). For further info, please refer to our "choose your vps" article in the same section of the board.
2. A file where you will write down a lot of info such as passwords, domains, anything you haven't done before and you think you might forget. If you like pen and paper, no problem, it will do.
3. While not required, a domain at least could be useful, but we will not need it just for this to work. Since the purpose of a panel is to host multiple sites or give your friends hosting access too, it doesn't really make sense not to have some domains, but as I said, it is no problem at all if you use free ones or free subdomains. My demonstration will make use of free subdomains from freedns.afraid.org but you may use your preferred ones.
It should be working the same on any other high quality host. Location does matter if you are hosting big movies, streaming content (EHCP has ffmpeg installed by default, this being one of the reasons I picked it for the demonstration) or game servers (but for that you do not really need a hosting panel, at most a special one). Otherwise, any location within an 100-150 ms or so ping will do. (ping board.prometeus.net to test prometeus suitability)
Phase one: Preparing the VPS
You should have an email about your new VPS. It should look like this:

Of course, that is just an example, we will not use the 50cents plan for a panel, it simply lacks the memory required.
We need from there the solusvm information. Address, username and password. Write them down.
Now go to SolusVM panel: https://solusvm.prometeus.net:5656 (Your actual provider will, of course, have a different address.)
Login. Will look like this:

Select your VPS, click manage. If it says Debian 6 32 bit (like in the picture, we are ready to go, if not, you need to reinstall it... Don't worry, with solus and OpenVZ it is simple as clicking around and waiting a bit.
Click reinstall (only if it is not already debian 6 32 bit ! Otherwise go to the update root password step) and you will be presented with a choice like this:

Make sure to select the Debian 6 32 bit radio button and proceed with the reinstallation. It should take about 2 minutes or less.
Update root password: Go back to the solusvm panel and select root password. Input something at least 8 chars long, only letters and numbers because solusvm has a bug that will prevent some special characters from working. We will change the password later while inside, for now, mypass1234 or anything like that will work.
From now on we will stop using graphical tools for a while and only use command line. It should not be hard if you follow my instructions.
If you use a MacOS of some kind, you will use the terminal (ssh root@yourvps IP will do the trick) but we are mostly here to help windows people which do not know much linux if at all so the rest of the tutorial will make heavy use of windows specific tools.
So, the windows users should download putty from here: http://www.chiark.greenend.org.uk/~sgta ... nload.html (get the putty.exe version).
Fire it up and put there the IP of your VPS and a session name. Before loging in, save the settings.

At first login putty will ask you if you accept the key. This will happen each time you reinstall or connect to a new VPS, but not in regular conditions.
Put your username (always root), hit enter, then the password you just put in solusvm (or the one in the provisioning mail if you already had Debian 6 32 bit installed-make sure it is the ssh password, not the solusvm one) and you should receive a disclaimer from your Debian server showing that it is ready to work for you.

(without the disclaimer, tho, your image will be a bit different)
Change root password to something more complex than only numbers and letters, include special chars such as *&#$ in the next step. You will be asked to insert your new UNIX password and confirm it:
Code: Select all
passwdAfter this, your root password used to login with putty will be the new one.
Now, we update the installation, a thing we will need to do from time to time to keep the risk of exploit minimal. Type (or copy-paste to be sure) exactly as below hitting enter after each line.
Code: Select all
apt-get updateCode: Select all
apt-get upgradeNow we are ready to install the panel. It will take a while and we will need to answer a few questions along the way as well as input many passwords and usernames we will need later. Make sure you write them down, use fairly complex ones (could be only one though, if you really have a problem with passwords, but make it at least 10 characters long, use only letters and numbers to be sure it works in all places).
It will be continued in the next post on this thread.
Admin
